
Introduction
A well-organized workshop is about cleanliness, efficiency, safety, and productivity. In a space where creativity meets hard work, having an organized area can significantly impact your workflow and overall satisfaction. DIY storage solutions stand out for their cost-effectiveness, adaptability, and capacity to maximize limited spaces. They allow for a tailored approach that commercial options can’t match, fitting perfectly with your workshop’s unique dimensions and needs. This article delves into step-by-step guides that transform your cluttered workspace into an oasis of order and efficiency.
Key Takeaway
The key takeaway from “DIY Workshop Storage Solutions: Step-by-Step Guides for Maximizing Space and Efficiency” is that with the right strategies and creativity, transforming your workshop into a highly efficient and organized space is achievable and rewarding. By following the practical step-by-step guides, you can create custom storage solutions that cater to your needs and workspace dimensions, leading to a more productive and enjoyable crafting experience. Start small, utilize every available space wisely, and gradually build your ideal workshop. Remember, a well-organized workshop improves efficiency and enhances safety and overall workflow. Visit Pneumatictoolz.com for tools and accessories to support your storage and organization projects.
Assessing Your Workshop’s Storage Needs
This section sets the foundation for a comprehensive guide to creating efficient DIY storage solutions in your workshop. Stay tuned for further insights and detailed instructions in the following sections. Implementing these strategies will improve your workspace’s functionality and enhance your overall productivity and enjoyment of your craft.
Evaluating Your Space: The first step in revolutionizing your workshop storage is thoroughly assessing your current setup. Look at your space critically—identify what’s working and what’s not. How much floor space do you have? What about wall and ceiling space? Recognizing these aspects will help you understand your workshop’s potential and limitations.
Decluttering Strategies: Decluttering is pivotal. Begin by sorting your tools and materials, deciding what stays and what goes. Adopt the “one-year rule”: if you haven’t used an item in the past year, consider removing it. Organize remaining items by frequency of use and necessity.
Future-Proofing Your Space: Think ahead. What tools might you acquire in the future? Planning for additional purchases will help prevent your newly organized space from becoming cluttered again. Allocating space now means less hassle later.
Materials and Tools Required for DIY Storage Projects
Essential Supplies: Gather all necessary materials and tools before diving into the building. This typically includes wood or metal for shelving, screws, brackets, a drill, a saw, measuring tape, and safety gear. Create a checklist to ensure you start your projects fully equipped.
Safety First: Take your time with safety equipment. Eye protection, gloves, and masks are essential when cutting materials or working with potentially hazardous substances.
Budgeting and Sourcing: DIY doesn’t have to break the bank. Look for repurposed materials or check out local sales and online marketplaces for deals. Sticking to a budget doesn’t mean compromising quality; it’s about smart spending.
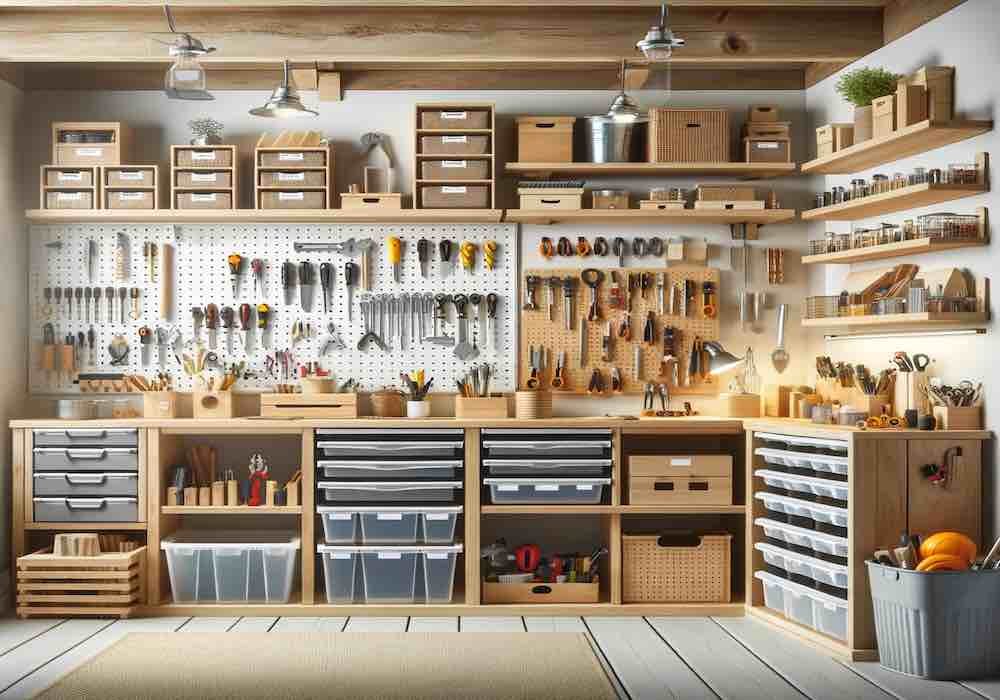
Creating Vertical Storage Solutions
Wall-mounted Shelves: Transform your workshop walls into storage powerhouses. Start by determining the best location based on what you need to store and access frequently. Measure, cut, and mount your shelving securely, ensuring it can bear the weight of your tools and materials.
Pegboard Perfection: Pegboards are the epitome of customizable storage. Outline the size you need and securely attach it to your workshop wall. Use hooks and holders to create a flexible system that can change as your tool collection evolves.
Ceiling Savvy: Don’t forget the space overhead! Installing ceiling racks can be an excellent solution for long, bulky items or materials not frequently used. Ensure everything is well-secured to avoid accidents.
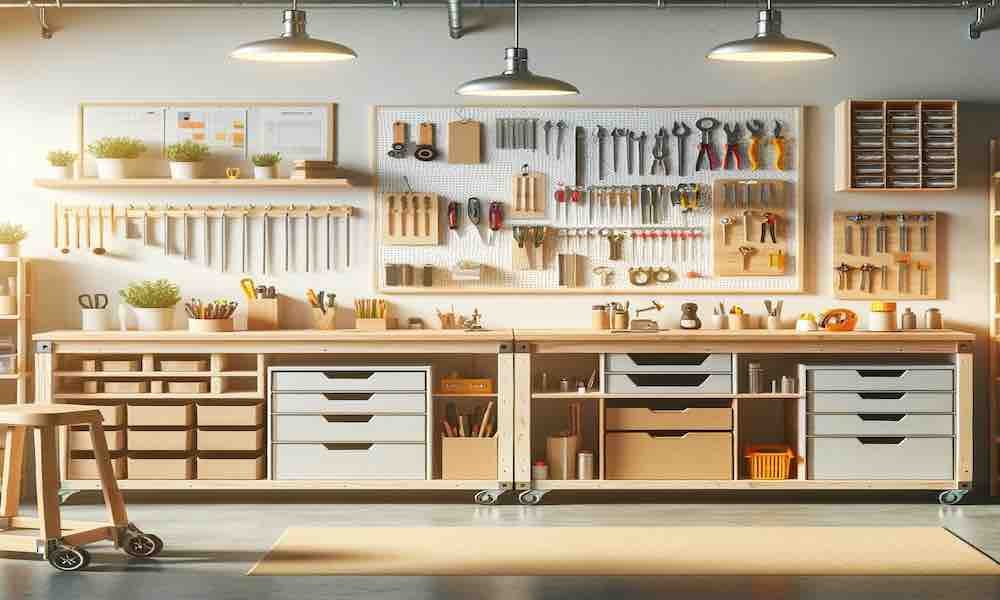
Constructing Mobile Storage Units
Mobile Workbench Wonders: A workbench on wheels offers flexibility in your workshop layout. Incorporate storage beneath for tools you use regularly, ensuring everything you need is at arm’s reach without taking up valuable floor space.
Roll-out Cabinets: Under-workbench space often needs to be more utilized. Building roll-out cabinets or bins can significantly increase your storage options while keeping items dust-free and easily accessible.
Mobility Benefits: The beauty of mobile storage is in its flexibility. Rearrange your workshop layout based on current projects and needs, making your workspace truly work for you.
Designing Modular Storage Systems
Building Stackable Boxes or Bins: Modular storage systems offer unparalleled flexibility for a dynamic workshop. Start by designing stackable boxes or bins that fit your space and needs. Use durable materials like plywood or heavy-duty plastic. Ensure they are of uniform size for easy stacking and accessibility.
Customizable Shelving Units: The heart of modular storage lies in its adaptability. Construct shelving units with adjustable shelves to accommodate tools and materials of various sizes. Incorporating slots or pegs can allow for easy adjustment and customization as your storage needs change.
Labeling and Categorizing: Efficiency in a workshop is about storing items and effortlessly finding them. Label each box, bin, and shelf clearly and logically. Group similar items together and categorize them in a way that makes sense for your workflow.
Optimizing Small Spaces with Clever Storage Hacks
Repurposing Household Items: Pay attention to household items for storage solutions. Old jars, magnetic strips, and even ice cube trays can be repurposed to organize small parts like screws, nails, and brackets. This approach saves space and recycles items that might otherwise go to waste.
Storing Small Parts and Hardware: Small components can easily become lost or cluttered. Implement clear storage solutions such as transparent containers or labeled drawers. Utilize wall-mounted magnetic boards or pegboards to hang and organize metallic items within arm’s reach.
Innovative Solutions for Limited Spaces: When space is at a premium, creativity is critical. Utilize the backs of doors, the sides of cabinets, or even the space under your workbench. Consider fold-down worktables or collapsible shelves that can be tucked away when not in use.
Maintaining and Evolving Your Storage System
Keeping Your Workshop Organized: Consistency is crucial for maintaining an organized workshop. Set aside time regularly to clean up, put tools back in their designated places, and check for items that need repair or replacement. This routine maintenance ensures your workshop remains an efficient and pleasant workplace.
Adapting to Changing Needs: As your skills grow and your project scope expands, your storage needs will inevitably change. Stay flexible by designing your storage solutions with the future in mind. Be prepared to periodically reevaluate and reorganize your space to accommodate new tools and materials.
Regular Audits and Reorganization: Conduct bi-annual audits of your workshop to reassess the effectiveness of your storage solutions. Don’t hesitate to discard what no longer works and try different approaches. Engage in regular reorganization to eliminate clutter and optimize workflow efficiency.
Safety Considerations and Maintenance
Securing Your Storage Solutions: Safety should always be considered. Ensure all shelving and storage units are securely fastened to walls or floors. Heavy items should be stored at lower levels to prevent injuries, and pathways should always be clear to avoid tripping hazards.
Routine Maintenance Checks: Regular inspections of your DIY storage systems can prevent accidents and prolong their lifespan. Check for signs of wear and tear, loose components, or potential hazards. Address these issues promptly to maintain a safe working environment.
Combating Moisture, Dust, and Pests: Protect your tools and materials from damage by implementing measures to control moisture, dust, and pests. Use dehumidifiers, and dust covers, and seal any gaps where pests could enter. Regular cleaning and proper storage will keep your workshop in top condition.
Following these steps and integrating these strategies into your workshop will create a more productive, efficient, and safe working environment. Remember, the best workshop is flexible and adapts to your evolving needs and ensures your projects’ success.
Conclusion
Implementing DIY workshop storage solutions streamlines your workspace and enhances productivity and safety. The key to a successful transformation lies in understanding your needs, making the most of every inch of space, and ensuring everything has its rightful place. By starting small and focusing on gradual improvements, you can significantly impact your workshop’s functionality and overall workflow.
We encourage you to begin your journey toward a more organized and efficient workshop. Take the first step, apply the tips and strategies shared, and remember, every great workshop starts with a single shelf, bin, or pegboard. Share your successes and challenges with us; your experiences inspire and help others in their DIY journey.
Are you ready to transform your workshop into a model of efficiency and safety? Start your DIY workshop storage project today! Begin with a tiny area and expand as you see the benefits unfold in your workspace.
For more DIY tips, guides, and inspiration, subscribe to our newsletter. We’re here to support you every step of the way. If you need high-quality tools and accessories to complete your projects, visit pneumatictoolz.com or contact us at sales@pneumatictoolz.com. Discover our wide range of pneumatic tools and accessories designed for every DIY enthusiast.
FAQs
What are the first steps in starting a DIY workshop storage project?
- Begin by assessing your current space, identifying the most needed areas for improvement, and decluttering unnecessary items. Then, choose a small section to start and plan your storage solution based on the tips provided.
Can I implement these storage solutions on a tight budget?
- Absolutely! Many DIY storage solutions can be crafted from repurposed materials or inexpensive supplies. Start small, and look for items you can reuse or repurpose before purchasing new ones.
How can I maintain my new workshop organization?
- Regularly clean and return tools to their designated spots after use. Schedule periodic reviews of your space to reorganize as needed and adapt to new tools or changes in your workflow.
What should I do if my workshop space is very limited?
- Focus on vertical and ceiling storage, utilize mobile units, and employ multifunctional furniture. Innovative solutions like fold-down workbenches can also save space.
Where can I find more ideas and inspiration for workshop storage?
- Visit our website at pneumatictoolz.com for more tips, guides, and to browse our selection of tools that can aid in your organization projects. Join our community and subscribe for the latest updates and inspirations.
Take the leap today and transform your workshop into a space where every project is a pleasure. Start small, plan effectively, and watch as your workspace becomes more productive and enjoyable.

